Moving the network
In the network editor you can move the entire network or selected network objects. These also include backgrounds, static 3D models, 3D traffic signals and keyframes (camera positions with a viewing direction).
Background images are not moved with the network in the Z direction.
If in the Network Settings you selected imperial units, these are displayed in the Move Network window. Vissim converts the values entered into meters.
1. On the Edit menu, click > Move Network.
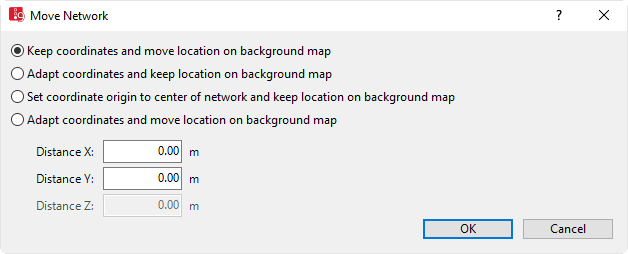
2. Make the desired changes:
| Element | Description |
|---|---|
| Keep coordinates and move location on background map |
Corresponds to the function of mapping a Vissim network to a background map (Mapping Vissim network to background position). Select this option, if for example the network is not mapped correctly to the background map. Distance Z cannot be changed. |
| Adapt coordinates and keep location on background map |
Select this option, for example, to transfer coordinates of a plan or ground plan. This allows you to enter values for the distances Distance X, Distance Y, Distance Z. |
| Set coordinate origin to center of network and keep location on background map |
As neither the network nor the map reference point were moved, the distances cannot be changed. Select this option, for example, when you have moved the network too far, the coordinate values of the reference point in the network are now very high and you want to set them to 0.000,0.000. |
| Adapt coordinates and move location on background map |
Corresponds to the function of moving selected, individual network objects in the network editor. |
3. If desired and if the option selected allows for the entry, into the Distance X, Distance Y, Distance Z boxes, enter the values of your choice.
4. Confirm with OK.
Superordinate topic:
Related topics:
Setting up a road network or PT link network
Copying and pasting network objects into the Network Editor
Editing network objects, attributes and attribute values
Displaying and selecting network objects
Modeling parking and stopping on the roadside
Modeling short-range public transportation
Modeling intersection control without signal controller
