Editing signal programs
Signal group-based signal programs allow individual editing of individual signal groups and/or switching times. You can edit these graphically and in the time table. You can change the display type of the table columns and the signal states via the shortcut menu.
1. Open the signal controller editor (Opening and using the signal controller editor).
2. Double-click the desired signal controller in the Navigator.
3. Double-click Signal programs in the Navigator.
The signal programs list opens.
4. Click the desired entry.
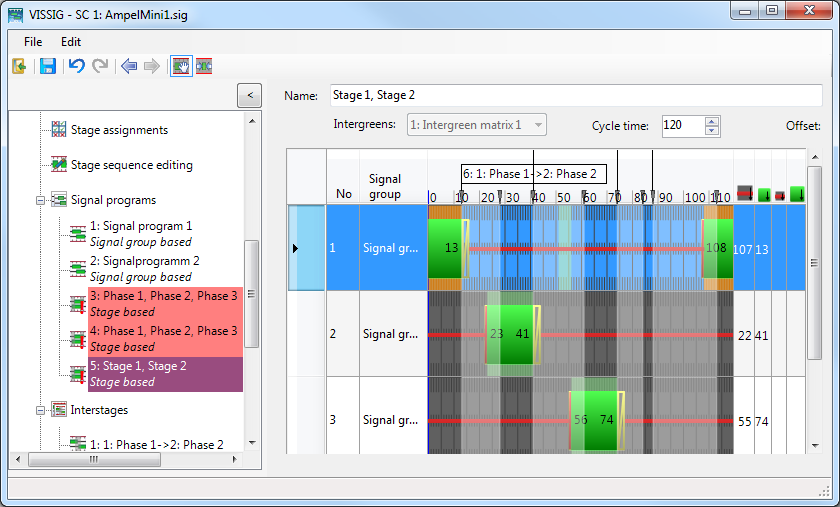
The signal program is displayed.

Functions in the shortcut menu
5. Right-click the entry of your choice.
6. Make the desired changes:
| Element | Description |
|---|---|
| Export | From Vissig, you can export stage sequences, signal programs, and interstages as graphic files (Exporting data from the signal controller editor). |
| Display |
View of Signal Programs:
|
| Resize automatically | The row height is automatically adjusted if you change the window size |
| Show entire signal program | Redraws the signal program and adjusts the row height to the window height |
|
Signal group based editing, stage based editing |
Select a row and move a starting point or end point of a signal state of variable duration with the mouse button held down. You can also select the editing mode via the toolbar. |
| Stretch/Compress | Select a row and expand or compress the signal state in the time axis labeling with the mouse button held down. You can also select the editing mode via the toolbar. |
| Extract interstage | In Vissig, in the graphical view, you may cut out an interstage of your choice for signal group based signal programs. After selecting this function, the cursor changes into a cross in the Cycle Times column above the graph. With the mouse held down, drag the area that you want to extract. The editing view of the selected interstage opens (Editing interstages). You can also select the editing mode via the toolbar. |
| Second green time |
Only in signal group-based signal programs: Create additional green time. A second green time (double throw) can be created only via the shortcut menu.
|
| Time axis labeling absolute (offset considered) | Labeling of the time axis starts with the offset time set, not with 0. |
| Edit columns… |
Only in signal group-based signal programs: the Select time columns to be displayed window opens. The settings are saved to the registry of your computer and may change depending on the user.
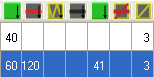
You can select entries and display them as columns via the arrow symbols or remove the columns. A column is added for table entries of signal states with a fixed duration, as the amber time e.g. is identical for each green time. A double column is added for table entries of signal states with a variable duration, as there can be two green times within one cycle which can have different durations, start and end times. The columns for stage-based signal programs with signal states with a fixed duration are not displayed, even when selected. For stage-based signal programs, the fixed durations of the definition of signal groups are used that cannot be changed. |

Changing row height
1. Click on the desired row.
2. Point with the cursor to the line between two rows in the first gray column.
The cursor changes into a bidirectional arrow.
![]()
3. With the left mouse button held down, drag the line up or down.
Functions in the toolbar
You can select the editing mode
| Symbol | Description |
|---|---|
|
|
Edit signal states |
|
|
Stretch/Compress |
|
|
Extract interstage |
Defining formatting of graphical representation
- ► From the menu, choose Edit > Options tab View (Performing green time optimization of stage-based fixed time controllers).
Editing switching times graphically
1. Click on the  Edit signal states icon.
2. Click the desired entry.
3. If you move the cursor over the switching time view, you can select one of the following options:
|
View |
Description |
|---|---|
|
|
Move signal state with variable duration with the mouse button held down. |
|
|
Only for signal group based signal programs: Drag starting time or end time of a signal state with variable duration with the mouse button held down. |
|
|
You cannot directly move signal states with a fixed duration (transition states). |
|
|
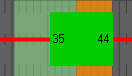
Only for stage-based signal programs: When a signal state is being shifted, the reserve times are indicated by a green background. Intergreen time violations are indicated by an orange background. Violations of minimum durations are indicated by a red background. In front of rows with intergreen time violations or violations of minimum durations, the |
|
|
Within the time axis labeling, you can move the entire signal program or the zero point of the signal program. |


 symbol is displayed.
|
|
Note: Keep the cursor in the selected area. Otherwise, the move is canceled. |

You can change the durations of the transition states individually in the table for the currently edited signal program, if they differ from the default durations defined in the signal group, for example higher amber times in bad weather programs for signal group based signal programs.
Stretching or compressing signal programs
1. Click on the  Stretch/Compress icon.
2. If you move the cursor over the time axis labeling, you can select one of the following options:
|
View |
Description |
|---|---|
|
|
Compressing a signal program: Hold the mouse button down and drag the cursor to the left. The area highlighted in red is extracted. |
|
|
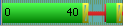
Stretching the signal program: Hold the mouse button down and drag the cursor to the right within the time axis labeling. The duration of the area highlighted in green is inserted at the start of this area. |
|
|
The highlighted area is displayed with a gray background: Compress/Stretch is not possible (violation of minimum durations). |


3. If you want to cancel Stretch/Compress, release the mouse button outside the time axis labeling.
Extracting and saving interstage
Only for signal group based signal programs:
1. Click on the  Extract interstage icon.
2. Hold the mouse button down and drag the cursor to the right within the time axis labeling.
|
View |
Description |
|---|---|
|
|
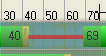
Valid interstage: The background is displayed in green. After you have released the mouse button within the time axis labeling, the system automatically changes to the editing view of the interstage and saves this interstage. If the From stage and the To stage of the interstage do not exist, these are also created for the extracted interstage. You can edit From stage and To stage (Editing interstages). |
|
|
Invalid interstage: The background is displayed in gray if a amber stage was not completely highlighted. The interstage cannot be saved. |
|
|
Only one status change per signal group: If you highlight a second green time at the same time, the background is displayed in gray. No interstage can be saved. |


3. If you want to cancel Extract interstage, release the mouse button outside the time axis labeling.
Editing stage-based signal programs
You can change the position of the stages within the signal program.
In stage-based signal programs, it is not possible to
- edit every switching time individually
- extract interstage
1. Make sure that:
- you have defined an intergreen matrix as default (Editing stage assignment)
- you have defined stages (Defining and editing stages)
- you have defined a stage assignment (Editing stage assignment)
- you have edited the stage sequence and created the signal program (Editing stage sequence)
On the toolbar, you have enabled the Stage based editing button.
2. Make the desired changes:
|
View |
Description |
|---|---|
|
|
Move the start markings or end markings of interstages |
|
|
Move the name of interstages |
|
|
Move the interstages within the signal program. This is possible only for interstages with a duration greater than 0 seconds. |


The duration of the transition states for interstages are set by default to the default values from the definitions of the signal groups.
3. If desired, compress or stretch the individual stages.
Zooming in on the graphical representation of the signal program
You can enlarge a specific area of the graphical signal programs. Thus you can edit individual switching times more precisely, for example, with a switch point every 1/10 seconds if signal controller cycle = 10.
1. Click on the desired entry.
The row is highlighted.
2. Click in the graphics area of the row.
The cursor changes to the following symbol:
3. If you want to stretch the time range, click the scroll wheel in the graphics area of the row.
4. If you want to reset the time range again, click the scroll wheel again in the graphics area of the row.
