The Scenario Results layer allows you to visualize your scenario simulations results on the map according to a number of parameters.
In order to activate it, you must first open the Scenario evaluation workspace by clicking on the Scenario widget (→ Control Room dashboard) and start a scenario simulation:

Once the simulation is finished (its status must be Completed), you can open your map workspace and select the Scenario Results layer.
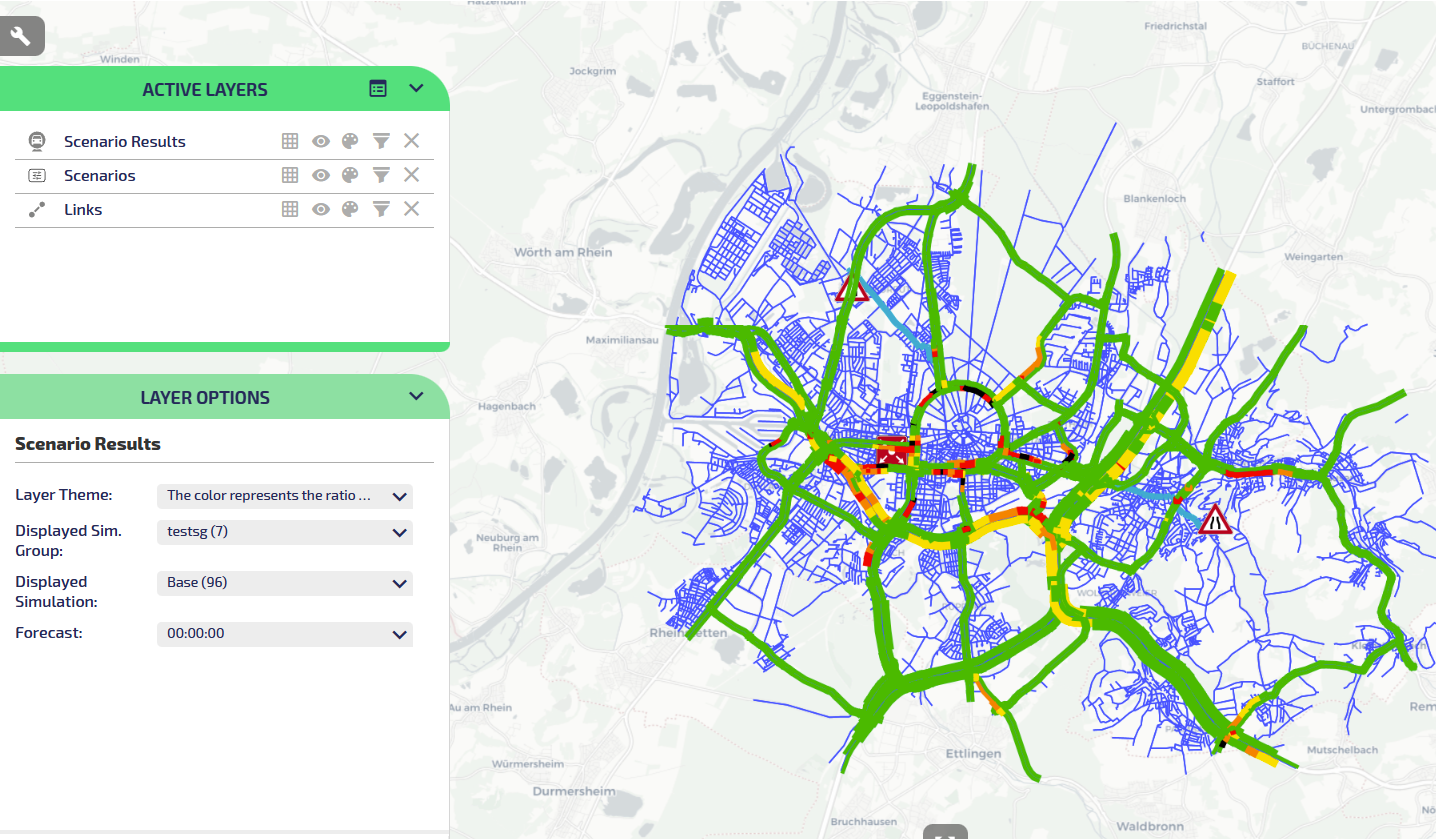
Important: Every time you select and apply different → LAYER OPTIONS, the relevant simulation and associated information changes displayed on the map will vary accordingly.
| Info type | Description |
|---|---|
|
|
Traffic data is not available. |
|
|
The traffic flow is heavily blocked. |
|
|
The traffic flow proceeds slowly. |
|
|
The traffic flow is almost fluid. |
|
|
The traffic flow is fluid. |
|
|
The traffic flow proceeds at very high speed, that is, very close or higher than V0. |
 V or V0 not available
 V/V0 <= 10%
 10% <V/V0 <= 25%
 25% <V/V0 <= 50%
 50% <V/V0 <= 75%
 V/V0 > 75%
| Option type | Description |
|---|---|
|
Theme |
It allows you to choose one of a set of graphic themes to represent the layer entities. |
|
Displayed Sim. Group |
It allows you to choose the simulation group you wish to display among those you previously configured. |
|
Displayed Simulation |
It allows you to choose the simulation you wish to display among those you previously configured. |
|
Forecast |
It allows you to set the timing of your desired forecast. |
| Button type | Description |
|---|---|
|
LIST |
It opens the list of scenarios. |
In order to apply a wide set of scenario attributes, see → Scenario management.
- Click on a scenario icon to open the pop-up window with detailed information about the event.
- Select the layer in the ACTIVE LAYERS list.
- Click the
 List icon.
A pop-up window with a list of items opens. Every item represents a scenario which is characterized by a set of attributes.
Other operations are available for the layer: (→ Operations on layers).
Topics in this section