In Visum you can specify which attributes are displayed or used in a window. The window for selecting attributes provides less functionality when selecting a single attribute than when selecting several attributes.
Selection of a single attribute
If you can select only one attribute in the program (for example, when choosing an attribute for the classified drawing mode in the graphic parameters), a search field is displayed that also functions as a selection field.

1. Click in the search field.
An attribute selection list is displayed.
2. Enter a search term or an attribute name in the field to restrict the attribute selection list, where applicable.
Each input filters the attribute selection list accordingly.
3. Click the desired attribute in the list to select it.
The attribute is displayed in the selection field and the attribute selection list is closed.
|
Tip: Alternatively, you can click the |
 symbol. The attribute selection list then opens in a separate window
 |
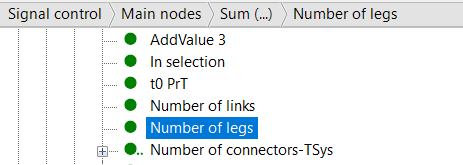
Notes: If you position your mouse pointer over an attribute, a tooltip appears. It shows its long name, for indirect attributes it specifies additionally the related network object type and, if applicable, the aggregation function of the attribute. The full path to the selected attribute is displayed above the list of attributes. If you click an element in the path, the corresponding attribute is automatically highlighted in the attribute selection:
Below the attribute list, the Description of the selected attribute is displayed. As soon as you add an attribute from the left list to the right list, the Quick access section appears below the left list and the attribute is displayed in it. The quick access displays a maximum of the five previously selected attributes. The attributes last selected within the last hour are at the top. You can expand and collapse the Description and Quick access sections. |
|
Section |
Name |
Description |
|
|
|
Network object types can have many attributes and indirect attributes. To quickly find the attribute or indirect attribute you are looking for, you can enter the name of the attribute or indirect attribute in the search field in the attribute selection window. The list is narrowed down to matching entries. To search for attributes at a lower level of the structure or to search for indirect attributes, enter the character \ for each level: for example From-node\Number. |
|
|
Filtered by: |
This symbol opens the Attribute filter window. Time intervals You can define by time intervals before selecting an attribute. The filter is relevant for attributes with a time reference, for example the Volume. Only the attributes for the time intervals defined here are then displayed. You can edit the Time period of the calendar period using Edit time range. The setting options depend on the calendar used (Selecting a calendar ). Notes
|
|
|
Creating a user-defined attribute |
This symbol open the Create user-defined attribute (network object type) window (Creating a user-defined attribute). |
|
|
Systematic sorting |
Default setting The most frequently used attributes are listed at the top of the list, indirect attributes are listed at the bottom. Note You can adjust the default setting (Specifying settings for the attribute selection windows). |
|
|
Alphanumerical sorting |
When picking this sorting, special entries (for example 1.0 or no selection) are listed first, and then, in alphabetical order, the direct attributes, and finally the indirect attributes. Attributes on lower levels are also arranged in alphabetical order. |
|
|
Hierarchical sorting |
When picking this sorting, special entries are listed first. Then, one directory is listed for each existing attribute category (marked by a c). These contain the direct attributes of the respective category in alphabetical order. Finally, the indirect attributes are listed in alphabetical order. |
|
|
User-defined attribute |
Indicates a user-defined attribute that is assigned values |
|
|
User-defined attribute |
Indicates a user-defined attribute for which no values exist yet |
|
|
|
Indicates a user-defined alias for the name of an input attribute |
|
|
|
Indicates a user-defined alias for the name of an attribute that has not yet been calculated |
|
|
Create alias |
Use the icon to specify a user-defined alias for an attribute name for a faster access. The alias is listed in addition to the preset short or long name (Specifying an alias for attribute names). |
|
|
Edit alias |
Click the symbol to edit a user-defined alias (Editing an alias). |

|
Delete alias |
Click the symbol to delete a user-defined alias (Deleting an alias). |
|
Circle |
|
Green filled Signifies existing attribute values, i. e. input attributes and calculated output attributes, each without subattributes Green filled, with ellipsis Signifies existing attribute values, i. e. input attributes and calculated output attributes, each with subattributes Gray filled Signifies attributes for which the respective add-on module is not activated or matrices that are not available |
|
Ring |
|
Green Signifies output attributes that are not calculated yet. Green, with ellipsis Indicates output attributes with subattributes that have not yet been calculated Gray Indicates output attributes that are not calculated yet, for which the respective add-on module is not activated or matrices that are not available |
|
|
|
Indicates attribute categories that contain the direct attributes of the respective category in alphabetical order. |


 (only in the hierarchical sort view)
Selection of multiple attributes
If you can select more than one attribute, for example in lists, in the Quick view, or in the tabular timetable, the <Network object type>: select attributes window opens after you call it using the  symbol.
The window is separated in two sections:
- The left section shows the attributes that you can add to the attribute selection. This window essentially corresponds to the one that is used to select one attribute.
- The right section shows the current attribute selection. These are the currently selected attributes and their settings. You can edit these settings.
1. In the right section, mark the attribute below which you want to insert a new attribute.
2. If required, edit the preselection of the analysis periods of the attributes with a time reference for which you want to display attribute values.
3. On the left, select the attribute you want to add.
4. Click the Add symbol ![]() .
.
The attribute is inserted in the desired position in the list of selected attributes.
5. Confirm with OK.
The selected attributes are displayed according to your settings.
Deleting attributes from the selection
1. In the right section, mark the desired attributes.
2. Click the Delete symbol ![]() .
.
The marked attributes are deleted from the selection.
3. Confirm with OK.
Including version comparison attributes in the selection
You can transfer the attributes of all open version comparisons to the selection.
1. In the left section of the navigator, mark the desired attributes.
2. Click the  Add from all version comparisons symbol.
The selected attributes of the opened network including the comparison attributes from the version comparisons are transferred to the selection and displayed in the right area of the window.
In comparison to selecting a single attribute, you have the following additional functions in the window for selecting several attributes:
|
Section |
Name |
Description |
|
|
Add |
Adds the selected attributes to the display Tip You can select multiple attributes from the list by holding down the Ctrl key and pressing the Arrow up or Arrow down keys, or by holding down the Shift key and clicking the first desired attribute and then the last desired attribute of a set of attributes. |
|
|
Add from all scenario comparisons |
Adds the selected attributes including the corresponding attributes of all existing version comparisons. |
|
|
Delete |
Removes the selected attributes from the display |
|
|
Move row(s) up |
Moves the selected attributes one row up in the list |
|
|
Move row(s) down |
Moves the selected attributes one row down in the list |
|
|
Add group of attributes |
Adds a group of attributes from the left section to the display: All user-defined attributes If this option has been selected, all user-defined attributes are added. All input attributes If this option has been selected, all input attributes are added. All attributes If this option has been selected, all attributes are added. |

Duplicating an attribute in the selection window
In the multiple attribute selection window, you can duplicate a selected attribute. This way, you can, for example, easily insert variants of indirect attributes by changing the aggregation function of the duplicated attribute.
1. In the list of attributes selected on the right, right-click the desired attribute.
2. Select Duplicate from the shortcut menu.
The attribute is inserted directly below the duplicated attribute.
Copying an attribute ID
In the attribute selection window, you can copy the attribute ID of individual attributes to the clipboard as follows, for example, to use them in a script.
1. Open the desired attribute selection window (Accessing attributes).
2. Right-click the attribute whose attribute ID you want to copy to the clipboard.
3. From the shortcut menu, choose Copy attribute ID.
The attribute ID is copied to the clipboard.
