In certain situations, for example in secured data centers, the license server on which the license container is operated has no direct Internet access.
|
|
Tip: If the license container is a USB dongle, we recommend that you temporarily plug it into a computer with an Internet connection. Then, on the computer with the Internet connection, proceed as described on the linked page (Updating a license on a license server). After a successful update on a computer with an Internet connection, the USB dongle is then reconnected to the license server without an Internet connection. |

Only if this procedure is not possible, you have to update the license file-based.
Prerequisites for the file-based license update
- A current version of the CodeMeter Runtime Kit software is installed on the license server (Setting up a license server).
- A current version of the PTV License Manager (Standard) or (Server) tool is installed on the license server.
- You have access rights to the license server. This can also be done via a remote desktop connection.
- You have a computer with an Internet connection to communicate with the PTV server.
- A PTV Vision product or the PTV License Manager (Standard) tool is installed on the computer with the Internet connection.
Short overview of file-based license update
|
1. Start the license management on the computer with the Internet connection (Starting license management on the computer with an Internet connection). 2. On the license server, create a license request file for the license container where you want to activate the license (Creating a license request file). 3. Transfer the created license request file from the computer with the Internet connection to the server of PTV (Uploading the license request file ). 4. Receive a license activation file on the computer the with the Internet connection and transfer the file to the license server (Transferring the license activation file to the license server). 5. Create a receipt file on the license server and transfer the file from the computer with the Internet connection to the PTV server (Creating a receipt file on the license server). |
A detailed description is given in the following sections:
Starting license management on the computer with an Internet connection
1. On the computer with the Internet connection, open the License management window (Opening the license management in the product) or (Managing licenses with the PTV License Manager).
2. In the list of Licenses, select the license you want to update.
|
|
Tip: If necessary, click the |

3. Click the  Update selected license symbol.
The License Management window opens indicating that the license is located on a remote computer.
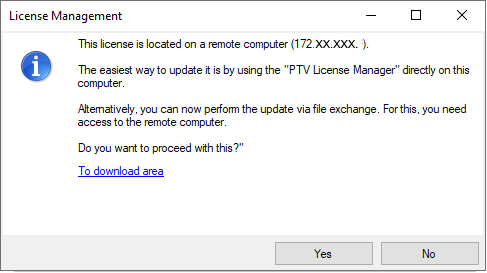
4. Click the Yes button.
The Step 1 of 2: Upload license request window opens. The following steps are described in the next section.
Creating a license request file on the license server and uploading it
In this step, you create a license request file on the license server for the license container where you want to update the license. Then send this file from the computer with Internet access to the PTV server to get back a license activation file.
Creating a license request file
1. Open the PTV License Manager tool on the license server.
2. In the License container list, select the desired license container.
3. Click the  Generate license request file (file-based) symbol.
The Browse For Folder window opens.
4. Save the created license request file ...RaC to a folder that you can access from the computer with the Internet connection.
Uploading the license request file
1. On the computer with the Internet connection, click the Select button in the Step 1 of 2: Upload license request window.
2. Navigate to the created license request file ...RAC and click the Open button.
3. Click the Next button.
Transferring the license activation file to the license server
4. In the Step 2 of 2: Transfer license window, click the Open folder button.
5. Copy the license activation file ...RaU to the license server.
6. Go to the CodeMeter settings window on the license server and click the  Import license update (file-based) symbol.
7. Navigate to the license activation file ...RaU and click the Open button.
In the next step, you still need to create a receipt file on the license server to complete the activation process:
Creating a receipt file on the license server
1. On the license server, switch to the CodeMeter settings window.
2. In the License container list, select the correct license container.
3. Click the Generate license request/receipt (file-based) symbol.
4. Save the receipt file to the folder from which the license request file was taken.
5. Transfer the receipt file ...RaC from the license server to the computer with the Internet connection and replace the license request file there (Creating a license request file on the license server and uploading it).
6. On the computer with the Internet connection, click the Finish button in the Step 2 of 2: Transfer License window.
The license is updated on the license server.
