Exporting data from the signal controller editor
You can export the following data:
- Graphic files
- Stage sequences
- Signal programs
- Interstages
- *.pua file
- *.sig file
- Export to Microsoft™ Excel™ only with Vissig
- Include graphic files in Microsoft™ Word™
Exporting graphic files
You can export stage sequences, signal programs and interstages as graphic files. You can format graphics in the signal controller editor. On the Edit menu, click Options. Then click the Export tab.
You can export the following file formats:
- *.bmp
- *.gif
- *.jpg
- *.png
- *.svg
- *.tif
Exporting a stage sequence
You can export the graphical representation of a stage sequence.
1. Generate a stage sequence (Editing stage sequence).
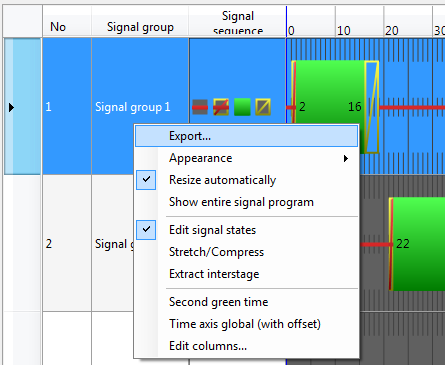
2. Right-click the lower part of the Stage sequence editing area.
3. On the shortcut menu, click Export.
The Save as window opens.
4. Choose the desired directory.
5. Specify a File name for the graphic file.
6. Select a File type.
7. Click on Save.
Exporting signal programs
1. Choose Signal programs in the Navigator.
2. Select a program in the list.
3. Right-click it.
4. On the shortcut menu, click Export.
The Save as window opens.
5. Choose the desired directory.
6. Specify a File name for the graphic file.
7. Select a File type.
8. Click on Save.
Exporting interstages
1. Choose Interstages in the Navigator and select an interstage in the list.
2. Right-click it.
The shortcut menu opens.

3. On the shortcut menu, click Export.
The Save as window opens.
4. Choose the desired directory.
5. Specify a File name for the graphic file.
6. Select a File type.
7. Click on Save.
Exporting *.pua file
|
|
Note: You will need the add-on module Vissig. |
The *.pua file is an output file of Vissig and an input file for a VAP control logic. Interstages can be exported in the *.pua file format.
1. On the File menu, click > Export > PUA.
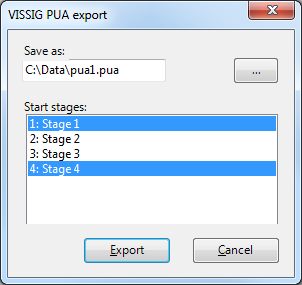
The VISSIG PUA export window opens.

|
|
Note: Settings that do not correspond to the conventions of the *.pua file format are displayed in the Export window, for example, spaces in the file name of a signal group. The correction is made in accordance with the conventions. The details are displayed in the Export window. If you close the Export window, the export will be continued. |
2. In the VISSIG PUA export window, click the button  next to Save as.
The Save as window opens.
3. Choose the desired directory.
4. Specify a file name.
5. Click on Save.
6. Select the Start stages in the VISSIG PUA export window.
7. Click on Export.
The *.pua file is generated and saved in the selected directory.
Exporting *.sig file
|
|
Note: You will need the add-on module Vissig. |
The *.sig file is a Vissig configuration file for versions prior to 2022.
1. On the File menu, click > Export > SIG.
A window opens.
2. Choose the desired directory.
3. Enter a file name *.sig.
4. Click on Save.
Vissig displays the *.sig file.
5. Check the settings.
6. Click  Save data and go back to Vissim.
Export to Microsoft™ Excel™ (only with Vissig)
All information of the fixed time controller can be exported in an Excel workbook.
1. On the File menu, click > Export > Excel workbook.
The Save as window opens.
2. Choose the desired directory.
3. Specify a File name for the Excel file.
4. Click on Save.
|
|
Note: The Excel file is saved as an *.xlsx file, the format of Microsoft™ Excel™ 2007. The file can also be opened with Microsoft™ Excel™ 2003, but must be converted to the older format for this purpose. You must install the Microsoft Office Compatibility Pack in this case. You can download this in the Microsoft™ Download Center |
|
|
Tip: You can also open the *.xlsx file with the program Calc (OpenOffice.org). Before you make changes to the file in Calc, save the file under a new name in the Calc format. |
Including graphic files in Microsoft™ Word™
In the following directory, you will find an example and instructions on how to include the exported graphic files and data from the Excel ™ file in transport documentation:
German: ..\Examples Training\SignalControl\Vissig Manual Example

 (
(

