1. Mark the desired network object (Marking network objects in the network).
2. Press F5.
The Edit course window opens.
|
Tip: You can also call the Edit course window via the shortcut menu > entry Edit course. |
3. Hold down the Shift key.
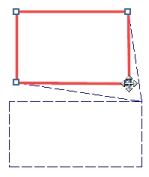
4. Click the desired merged polygon point and hold down the mouse button.
5. Drag the polygon point to the new position and release the mouse button.

The polygon points are separated and the boundaries adjusted.
6. Separate further merged polygon points, if required.
7. Confirm with OK.
Depending on the network object type, the following applies:
- In case of zones, territories, and polygonal POIs, the new boundaries are created immediately and the step ends here.
- In case of main nodes, main zones and restricted traffic areas, a query may open. Proceed with the next step.
8. Confirm with Yes.
The partial network objects (nodes, zones or links), which lie within the boundary, are allocated to the higher-level network object (main node, main zone, or restricted traffic area) and the new boundary is saved.
|
Note: If you want to create the main node, the main zone, or the restricted traffic area with a boundary but without allocated partial network objects, click No in the query. You can also allocate the partial network objects later (Allocating nodes to one or multiple main nodes and Editing main node attributes in the list view). |

