Selected a lane to insert individual lane turns.
1. Make sure that the Geometry view is selected in the Views window.
2. Select Lanes in the drop-down list.
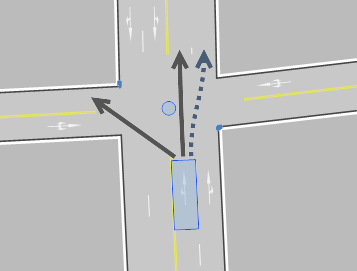
3. Select the desired lane (Marking lanes).
Possible lane turns are displayed as dashed lines. Existing lane turns are represented by solid arrows.
|
Note: You can also insert crossing lane turns. To do this, select Provide crossing lane turns for insertion from the shortcut menu. These are then displayed dashed in red. |
A plus sign is displayed when you point the mouse at a dashed arrow.
4. Click the desired lane turn.
The lane turn is inserted.
|
Notes: You can remove a lane turn by selecting it and choosing Delete marked lane turns from the shortcut menu. You can also edit the allocated transport systems via the shortcut menu. |
