Marking lanes and lane turns
As soon as you have marked a leg, you can mark the individual lanes
1. Make sure that the Geometry view is selected in the Views window.
2. Make sure that the Lanes option has been selected in the schematic view.
3. Mark the desired leg by clicking the respective button.
|
Note: A tooltip is provided for all buttons of the schematic view, which describes the action triggered when clicking the button. |
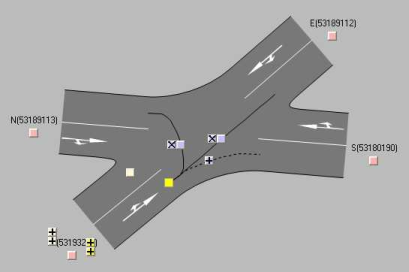
The lanes display further buttons to mark lanes.
4. Mark the desired lane by clicking the Mark lane buttons.
The lane turn and further buttons to mark lane turns are displayed if the lane provides lane turns.
5. If required, mark the desired lane turn by clicking the Mark lane turn button.
Further buttons are displayed to delete lane turns.
|
Note: You can edit the attributes of marked lane turns right in the list view. A lane that is marked in the schematic view, is also marked in the list view. |
