Complete Your Street Network
You can now create a complete street network by connecting your intersections and adjusting the roadway to match the actual geometry. This is done in two steps:
1. Connect intersections
2. Add Poly Points
Connect your intersections
1. Left-click over the unconnected intersection Leg Handle to select (highlighted blue).
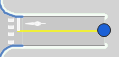
2. While holding the left mouse button, drag and drop the Leg Handle over another the Leg Handle to connect the two and create a link between them.
If you drag and drop the Leg Handle over a Node Handle, a new leg will be created for the Node Handle with a link between the Leg Handle and new Leg Handle.
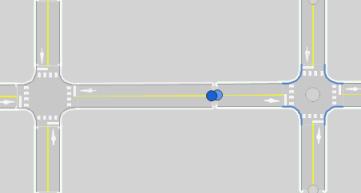
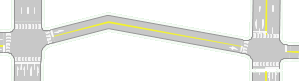
You can adjust your roadway geometry by adding and editing Poly Points on the link between two connected intersections and on the leg to an isolated / disconnected intersection. Poly Points are shown as blue squares and you can add or delete as many as needed.
Add Poly Points
Add Poly Points automatically
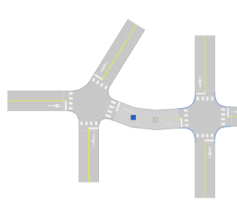
1. Left-click and drag any point on the link to create a Poly Point.
2. Continue to do this to achieve the desired roadway geometry.
Add Poly Points using the context menu
1. Left-click to highlight the leg or link (it will highlight in blue).
2. Right-click and select Insert Poly Point.
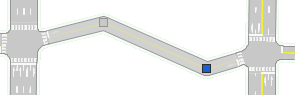
Edit Poly Points
- Drag and reposition the shape points to add curvature to the link.
Delete Poly Points, you can do this several ways:
1. Left-click to highlight a Poly Point and use the Delete key on your keyboard.
2. Right-click on a Poly Point and select either
- Delete Poly Point or
- Delete All Poly Points on Link : this will reset the geometry to a straight link between the two connected intersections.
Disconnect intersections
- Hover over the Link to delete, right-click and choose one of the following options:
- Delete Link: this will delete the connection between the two intersections while retaining the legs independently, including all defined Poly Points.
- Delete Link and Legs: this will delete the connection between the two intersections and the Legs that were connected, removing these as approach legs from each of the intersections.

|
Tip: You can also delete the Link by using the Delete key on your keyboard. |
Insert an intersection on an existing link
1. Right-click the link.
2. Choose Insert Intersection.
3. Select either Signalized, All-way stop, Two-way stop, Unknown or Roundabout.
Once your intersection has been added, you can edit its location and configuration using the steps previously described.

|
Note: If poly points are added to your intersection leg and you wish to keep these poly points, adding an intersection via the context menu will save the poly point locations. If you add an intersection adjacent to a leg, then connects legs together, any old poly points between legs will be deleted, as the legs between these intersections are redefined when connected. |
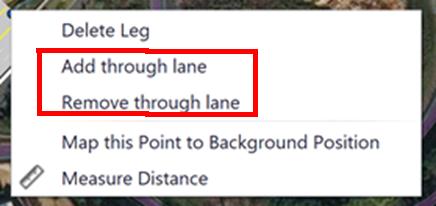
Add/Remove Additional Through Lane to external legs
1. Right-click on the node of an eternal leg to access the context menu.
2. Select add or remove through lane.
Approach Offset
A leg's Approach Offset can be defined on the Intersection Setup Workflow Table. The offset Value defines the leg's Approach offset to the center of the intersection in the direction of the legs’s approach direction. A positive value shifts the offset to the right and a negative value shifts the offset to the left. This offset is useful to represent elements, such as offset intersections or ramp junctions and is exported to PTV Vissim via ANM.
Radius Corner Curb
The Radius Corner Curb value can be defined on the Intersection Setup Workflow and is visualized in the Network Editor. This value is exported to PTV Vissim via ANM.
|
|
Note: Pre PTV Vistro 2021 networks that had a default 0 value will have a radius of 0 leading to sharp edges when the network is opened in PTV Vistro 2021 or later versions. To change the radius for all intersections at the same time use the Radius Corner Curb attribute in Multi Change tool under menu Edit > Multi Change. |
Stop Line and Crosswalk Setbacks
The Stop Line and Crosswalk setback values can be defined on the Intersection Setup Workflow and is visualized in the Network Editor. These offset values are exported to PTV Vissim via ANM to set the location of the crosswalk and stop lines, as well as size the intersection. When crosswalks are present, the Crosswalk Setback will also move the Stop Line, as the stop line is relative to the crosswalk location. Positive and negative values can be entered.
OpenStreetMaps Import
In addition to inserting intersection on the base map, you can import network geometry from OpenStreetMaps (OSM) with a .OSM file extension.
