Several servers are used to run micro-simulations with PTV Vissim. ASP.NET Core Runtime 8.0
PTV Optima Micro handles the communication with the Optima AS through the Optima Micro Message broker.
PTV Optima Micro is implemented in such a way that an arbitrary number of Optima Micro Workers can work as a fail-safe, distributed cluster.
Any Optima Micro Worker server can be restarted independently through the status of the others OMW servers and automatically rejoined to PTV Optima Micro while it is running.
On every OMW server of the cluster, it is necessary to install three components:
- PTV Vissim
- ptv-optima-micro.exe
- ptv-optima-scenecleaner.exe
Important: Before starting the installation procedure, see → Optima Micro prerequisites.
Caution: OMMB must be started before Optima AS and PTV Optima Micro. If all servers of the OMMB cluster are restarted, afterwards you must also restart all Optima AS and PTV Optima Micro services on all servers.
Every scenario simulation is based on 3-10 individual micro-simulations with different random seeds (3 is the minimum, 10 is recommended).
For one micro-simulation, you need a server with 4 cores.
Therefore, for a single scenario you need, at least, of 3 servers with 4 cores (for 3 different random seeds).
Typically, up to 4 scenarios shall be calculated in parallel. Therefore, at least 4x3=12 servers are required.
For simulations based on 10 different random seeds, 4x10=40 servers are required.
A server with 8 cores can handle 2 micro-simulations. Therefore, doubling CPU and RAM allows you to reduce the number of instances to 6-20, with a slight performance loss.
To install PTV Vissim, please see the Vissim Installation Manual.
The main procedure is outlined in the list:
-
Install PTV Vissim.
Important: You need the correct PTV Vissim version and service pack. The required PTV Vissim version can be found in the Micro-XX.Y.ZZZZZ.zip\ptv-optima-micro\_RequiredVissimVersion.txt file.
-
In the CodeMeter WebAdmin, open the Server Search List:
http://localhost:22352/configuration/server_search_list.html.
- Add the Optima Micro License server(s) to the Server Search List.
- Start PTV Vissim as the administrator and select the license for all users (please refer to the documentation of PTV Vissim).
- Register Vissim as COM-server.
-
Copy the file $MicroInstall\tools\defaults.layx to the \exe folder of your PTV Vissim installation.
This operation overwrites the existing file defaults.layx.
Tip: The usual default path is C:\Program Files\PTV Vision\PTV Visum 2020\exe.
Important: By default, Vissim is connected to Bing maps and shows a start page. Both features try to connect tothe Internet and can impact the functionality of Optima Micro in case of connection problems. Optima Micro runs PTV Vissim in a silent way and does not need these features. Bing maps and the start page are turned off by the new .layx.
- Install Microsoft ASP.NET Core Runtime 8.0
- Copy the Vissim_Model folder to a convenient place, indicated as $VISSIM_MODEL.
- From PTV-Optima-XX.Y.ZZZZZ.zip, extract Micro-XX.Y.ZZZZZ.zip.
- Uncompress Micro-XX.Y.ZZZZZ.zip in a convenient place, generally named as $MICROINSTALL.
- Copy $MICROINSTALL\config-templates\ptv-optima-microSettings.xml to $MICROINSTALL\settings.xml.
-
According to your needs, set the configuration parameters contained in $MICROINSTALL\settings.xml.
For details, see → Optima Micro configuration > ptv-optima-microSettings.xml.
In particular:
Configuration file TAG Description <BrokerList>
Contains a comma-separated list of hostname:port (or ip:port) of all servers of the message broker cluster.
Caution: The best option is to use DNSs instead of IP addresses, because DNSs have proven to be more robust and less error-prone.
</Configuration>
....

    <Logging>
        <!-- Output file for the logging. -->
        <PathFormat>c:\optima\micro\log\ptv-optima-micro-{Date}.txt</PathFormat>
        <!-- If this tag exists and a valid broker list is set -->
        <!-- all log messages will also be sent to the corresponding Kafka. -->
        <Kafka>
            <BrokerList>NodeBroker_1:9092,NodeBroker_2:9092,NodeBroker_3:9092</BrokerList>
        </Kafka>
    </Logging>
</Configuration>
<Vissim_Model>
Contains the path of the Vissim_model folder, as set in $VISSIM_MODEL (see step 2).
You can find this tag into two different sections:
<Configuration>
....

    <Prepare>
....
        <Vissim_Model>c:\optima\micro\Vissim_Model</Vissim_Model>
....
    <Prepare>

    <Simulate>
....
        <Vissim_Model>c:\optima\micro\Vissim_Model</Vissim_Model>
....
    </Simulate>

....
</Configuration>
<WorkingFolder>
Contains the path of the working folder of the application.
<Configuration>
....

    <Simulate>
....
        <WorkingFolder>c:\optima\micro\WorkingDirectory</WorkingFolder>
....
    </Simulate>
....
</Configuration>
<PathFormat>
Contains the path of the log file.
You must create the directory if it does not exist.
</Configuration> .... <Logging> <!-- Output file for the logging. --> <PathFormat>c:\optima\micro\log\ptv-optima-micro-{Date}.txt</PathFormat> <!-- If this tag exists and a valid broker list is set --> <!-- all log messages will also be sent to the corresponding Kafka. --> .... </Logging> </Configuration> -
Create a service ptv-optima-micro that starts $MICROINSTALL\ptv-optima-micro.exe.
-
Copy $MICROINSTALL\tools\nssm.exe to $MICROINSTALL.
- Open a window command shell as system administrator.
- Go to $MICROINSTALL\.
-
Run the command:
nssm.exe install ptv-optima-micro $MICROINSTALL\ptv-optima-micro.exe
-
Open the Windows Control Panel.
-
Open Administrative tools > Services.
-
Start the service ptv-optima-micro.
-
You can read the version of ptv-optima-micro.exe through the listed procedure:
- Select the file $MICROINSTALL\ptv-optima-micro.exe.
- Right-click ptv-optima-micro.exe.
-
Click Properties.
The ptv-optima-micro.exe Properties pop-up window opens.
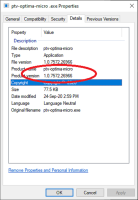

Important: The version number for ptv-optima-micro.exe is specific for this component and is not linked to the Optima release version number.
This optional tool can be used to clean:
- Log files.
- Temporary folders and files.
-
Install Microsoft ASP.NET Core Runtime 8.0
You can skip this step if you have previously installed ptv-optima-micro.exe.
- From PTV-Optima-XX.Y.ZZZZZ.zip, extract SceneCleaner-XX.Y.ZZZZZ.zip.
- Uncompress SceneCleaner-XX.Y.ZZZZZ.zip in a convenient place, generally named as $SCENE_CLEANER_INSTALL.
- Copy $SCENE_CLEANER_INSTALL\config-templates\ptv-optima-SceneCleanerSettings.xml to $SCENE_CLEANER_INSTALL\settings.xml.
-
According to your needs, set the configuration parameters contained in $SCENE_CLEANER_INSTALL\settings.xml.
For details, see → Optima Micro configuration > ptv-optima-SceneCleanerSettings.xml.
In particular:
Configuration file TAG Description <Folder>
Contains tags used to specify the path for:
- The working directory
- The log file
You can find this tag in at least one block <FolderToClean> (this block can be repeated more than one time).
The set values must be the same values specified in .$MICROINSTALL\settings.xml and associated to the tags:
- <WorkingFolder>
- <PathFormat>
<Configuration>
    <FoldersToClean>
        <!-- One entry for each folder that should be purged periodically. -->
        <FolderToClean>
            <!-- Folder that is cleaned. -->
            <Folder>c:\optima\micro\WorkingDirectory</Folder>
....
        </FolderToClean>
        <FolderToClean>
            <Folder>c:\optima\micro\Log</Folder>
....
        </FolderToClean>
    </FoldersToClean>
    <Logging>
        <PathFormat>c:\optima\micro\Log\SceneCleaner-{Date}.txt</PathFormat>
        <!-- If this tag and the broker list are set, log messages are sent to the Kafka log -->
        <Kafka>
            <!-- A comma separated list of hostname:port (or ip:port) of all servers of the message broker cluster-->
	     <BrokerList>%BrokerList%</BrokerList>
        </Kafka>
    </Logging>
</Configuration>
<PathFormat>
Contains the path for the log file.
You must create the directory if it does not exist.
</Configuration> .... <Logging> <!-- Output file for the logging. --> <PathFormat>c:\optima\micro\log\ptv-optima-micro-{Date}.txt</PathFormat> <!-- If this tag exists and a valid broker list is set --> <!-- all log messages will also be sent to the corresponding Kafka. --> .... </Logging> </Configuration> -
Create a service ptv-optima-scenecleaner that starts $SCENE_CLEANER_INSTALL\ptv-optima-scenecleaner.exe.
-
Copy $SCENE_CLEANER_INSTALL\tools\nssm.exe to $SCENE_CLEANER_INSTALL.
- Open a window command shell as system administrator.
- Go to $SCENE_CLEANER_INSTALL\.
-
Run the command:
nssm.exe install ptv-optima-micro $SCENE_CLEANER_INSTALL\ptv-optima-scenecleaner.exe
-
Open the Windows Control Panel.
-
Open Administrative tools > Services.
-
Start the service ptv-optima-scenecleaner.
-